First download the .bin files from here or here. Most probably the file names will be:
i86bi_linux_l2-adventerprisek9-ms.SSA.high_iron_20190423.bin This will the one for Switch Layer-2 device
i86bi_LinuxL3-AdvEnterpriseK9-M2_157_3_May_2018.bin This will for a router i.e. Layer-3 device
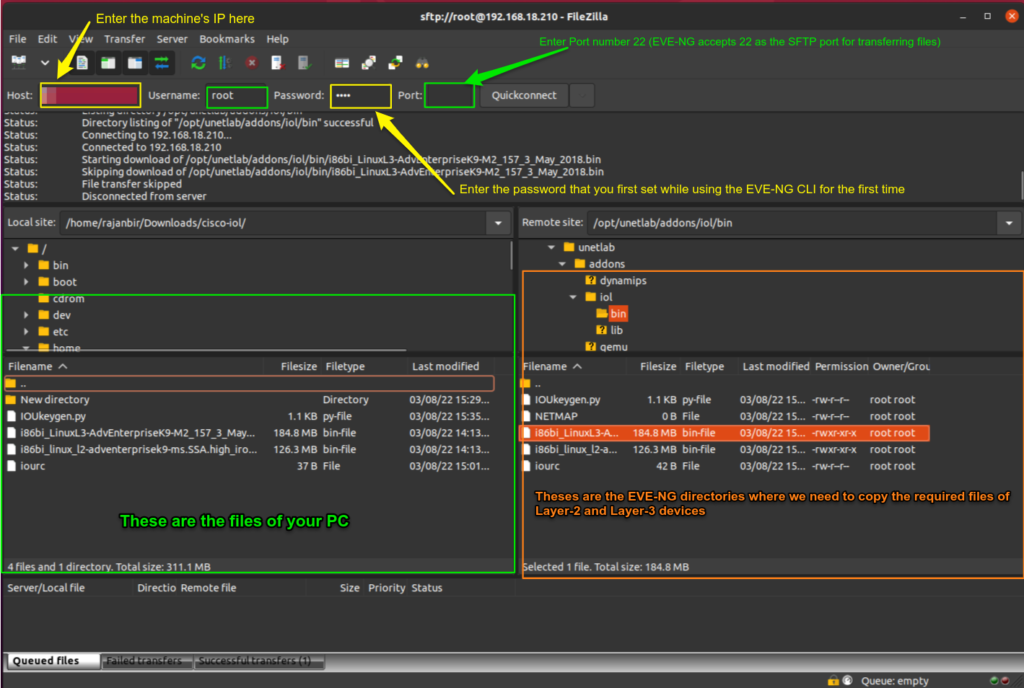
Further you need to paste these into the “/opt/unetlab/addons/iol/bin“ using the FTP client, I used Filezilla as follows:
First of all you need to know the ip of your EVE-NG machine that you are running using Virtual Box (the one that you used to get access in the browser), in my case it is 192.168.18.210 (statically given)
Once you have entered the required details, and connected to eve-ng, you will be able to see the contents as shown in the orange coloured box in the image above.
Then, in order to transfer the files, you can just navigate to the desired directory and drag the item(s) from green part to the orange part, and you have completed the file transfer.
Creating a IOURC license file…
Copy the code given below and name the file gen.py (You can give this file any name as per your convenience, but remember to keep the extension as .py , python will be able to run this file when given the command to do so) (The code has been taken from other available resources)
#! /usr/bin/python
print("*********************************************************************")
print("Cisco IOU License Generator - Kal 2011, python port of 2006 C version")
print("Modified to work with python3 by c_d 2014")
import os
import socket
import hashlib
import struct

# get the host id and host name to calculate the hostkey
hostid=os.popen("hostid").read().strip()
hostname = socket.gethostname()
ioukey=int(hostid,16)
for x in hostname:
 ioukey = ioukey + ord(x)
print("hostid=" + hostid +", hostname="+ hostname + ", ioukey=" + hex(ioukey)[2:])

# create the license using md5sum
iouPad1 = b'\x4B\x58\x21\x81\x56\x7B\x0D\xF3\x21\x43\x9B\x7E\xAC\x1D\xE6\x8A'
iouPad2 = b'\x80' + 39*b'\0'
md5input=iouPad1 + iouPad2 + struct.pack('!i', ioukey) + iouPad1
iouLicense=hashlib.md5(md5input).hexdigest()[:16]

print("\nAdd the following text to ~/.iourc:")
print("[license]\n" + hostname + " = " + iouLicense + ";\n")
print("You can disable the phone home feature with something like:")
print(" echo '127.0.0.127 xml.cisco.com' >> /etc/hosts\n")
transfer this gen.py file into the same directory where you moved the .bin files in the earlier steps
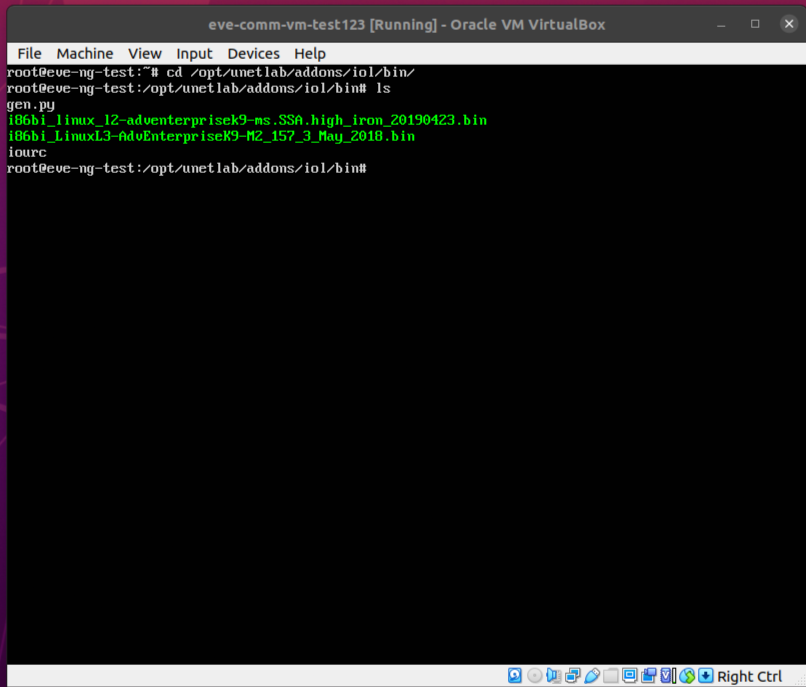
Now move to the EVE-NG CLI, and navigate to “/opt/unetlab/addons/iol/bin” where you have kept the .py file and other .bin files. This can be done using
cd /opt/unetlab/addons/iol/bin
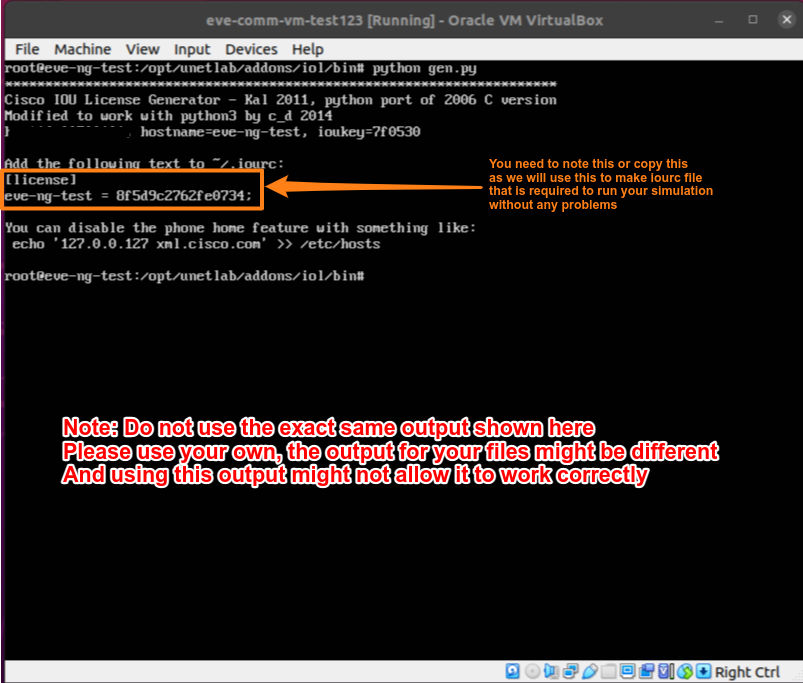
Now use the following command to run the .py file you just moved into “/opt/unetlab/addons/iol/bin“
python gen.py
Your output will be like this:
now you need to make a iourc file in “/opt/unetlab/addons/iol/bin” directory, you can do the same using
nano -c iourc

[license]
"your hostname" = "the key out put the program that you ran";
NOTE: I think you should not forget the semi-colon (;) at the end
after typing this into the file you need to press Ctrl+O in order to save the file, read the next message and type Y to confirm the filename and at last press Ctrl+X to close the nano editor.
You have completed the process, now you can type “ls” to see the contents, and you will have the following view.
Now your router and switch should be working perfectly in your simulation environment (that you access in your browser using the ip of your EVE-NG machine)
You also have to run the following command in order for everything to take effect:
/opt/unetlab/wrappers/unl_wrapper -a fixpermissions
4 responses to “Adding Cisco IOL to EVE-NG”
Great instruction, but i have 1 issue, my nodes start but after few seconds it stop. can i have any suggestion how to fixed this? thank you
there might be a problem with the license file that you used, I had the same problem, what I did was to add them again. Sorry for the late response.
Hi Ranjanbir –
It worked perfectly for me on my first try!! I am very grateful for your effort in creating this instruction.
Thanks
Devon
Hi Devon
Happy it could help!!